Cakes & Cupcakes • Seasonal
Red Velvet Bundt Cake
February 13, 2022
True story: I never really liked red velvet cake until I had THIS red velvet cake. It’s rich, tender and […]
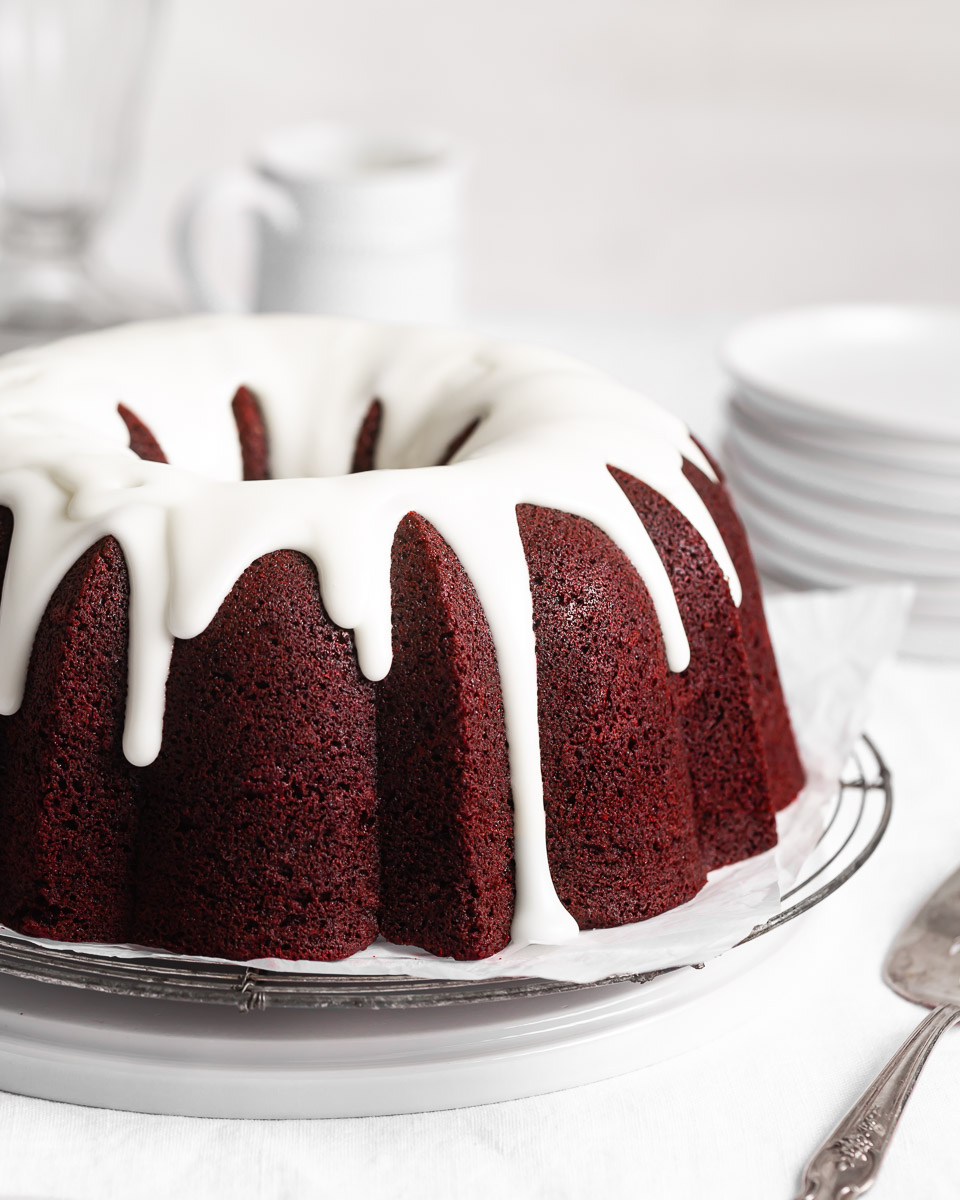
True story: I never really liked red velvet cake until I had THIS red velvet cake. It’s rich, tender and made perfectly moist with a melt-in-your-mouth velvety crumb. Topped with a silky smooth cream cheese glaze, this dreamy Bundt will steal your cake-loving heart!

Valentine’s Day is almost here and you know I’m celebrating with LOTS of chocolate. And cake! I’m not sure there is a more quintessential V-day dessert than red velvet cake. Just the name itself sounds luxurious. Top it off with a dreamy cream cheese frosting and prepare to fall fast in love.

Why you’ll love this red velvet cake
There’s a long list of reasons to adore this red velvet bundt cake, not the least of which it tastes positively amazing!
- Easy to make – bake this cake for your boo and you in about an hour with simple ingredients you probably already have in your pantry.
- Chocolate is your love language – Valentine’s Day is all about flowers and candy, but most of all, it’s about CHOCOLATE. This red velvet cake is perfect for all the chocolate (and vanilla!) lovers in your life.
- Cream cheese frosting – these three little words are the way to my heart. This homemade red velvet cake and cream cheese icing are truly a match made in heaven.
- No decorating skills required – This cake is waayyyy easier to make than a layer cake and there are zero piping or frosting skills needed to make this gorgeous show-stopper of a cake. Just bake and glaze for a dessert that is sure to impress!

What is red velvet cake?
From its roots as a Southern favorite, red velvet cake has become a classic that you’ll find in every corner bakery. It’s basically vanilla cake with a few tablespoons of cocoa powder and red food coloring mixed in. The flavor is not vanilla. And it’s not quite chocolate. It’s somewhere in between and when done right, the hint of tang from the cake mixed with the sweetness of the cream cheese frosting is a thing of magic. A splash of buttermilk and vinegar work together to create a dreamy texture that is rich, moist and well – velvety! Trust me, you’ll be first in line for a second slice!
Ingredients you need
You can make this red velvet bundt cake from scratch with just a handful of simple ingredients. Here’s what you’ll need:
- Flour – No fancy flour needed here! Regular all-purpose flour creates a light and tender crumb. Just be sure to measure your flour correctly so you don’t end up with a dry cake. Pro-tip: use a kitchen scale!
- Butter and oil – We’re using a combination of unsalted butter and canola oil for a super moist, velvety cake that won’t dry out. I tried this cake using only oil and only butter and found that a combination of the two delivered the best texture and flavor.
- Sugar – Granulated and brown sugar give the cake the perfect hint of sweetness and confectioners sugar is used in the simple cream cheese glaze.
- Cocoa powder – A little goes a long way for the perfect hint of chocolate flavor. Make sure to use regular unsweetened cocoa powder, not Dutch process.
- Eggs – 3 large eggs give this bundt a silky, perfectly cakey texture that is melt in your mouth delicious! Set your eggs out two hours before baking or place them in a bowl of warm water for 10 minutes.
- Buttermilk – The acid in the buttermilk works with the baking soda to give the cake structure and rise. If you don’t have buttermilk on hand, make your own by pouring one cup of whole milk. Remove one tablespoon of milk and add in one tablespoon of vinegar or lemon juice. Stir to combine and let sit for 5 minutes to curdle. It’s that easy!
- Vinegar – Combined with the buttermilk, vinegar helps give this cake its signature light and velvety texture and that distinct red velvet flavor. I use distilled white vinegar but apple cider vinegar works great too.
- Vanilla – the best cakes are made with the best vanilla. I love this one from Rodelle.
- Red food coloring – use gel food coloring to get that stunning deep, ruby red velvet color!
How to make red velvet cake
This Bundt cake comes together in about an hour and is pretty enough to serve right out of the pan. For best results, use a stand mixer to make the batter. For the cream cheese frosting, I like to use a hand mixer.
Step 1: Whisk together the flour, cocoa powder, baking soda and salt.
Step 2: Add the butter, oil and sugars to the bowl of a stand mixer fitted with the paddle attachment. Mix on medium high speed for 1-2 minutes until light and fluffy.
Step 3: Add the eggs, one at a time, mixing well between each addition. Scrape down the sides of the bowl as needed.
Step 4: Add the buttermilk, vanilla and vinegar. Mix on low speed to combine. Add the food coloring and mix until incorporated. Scrape down the sides of the bowl with a large spatula.
Step 5: Add the dry ingredients in two additions. For a soft and tender crumb, be careful not to over mix the batter. It should be light and fluffy with a rich, red hue.

Step 6: Once the batter is mixed, spray a 10-12 cup non-stick Bundt pan generously with baking spray. Be sure to cover the bottom and sides of the pan. Use a large spatula to transfer the batter to the prepared pan, smoothing the top to make it level.
Step 7: Bake the cake for 45 to 50 minutes, or until a toothpick inserted in the center of the cake comes out clean or with a few crumbs remaining. The cake should spring back when pressed gently.

How to get the cake out of the bundt pan
Bundt cakes are by far my favorite cakes to bake. They’re easy to make, delicious to eat and they look so pretty right out of the pan. That is unless they fall apart into a zillion crumbly pieces coming out of said pan.
I’ve made a lot of bundt cakes and take my word for it, they haven’t always come out looking like they’re straight from a bakery. Through plenty of trial and error, I’ve learned a few tricks that turn out the perfect bundt cake every time. Read on for all of my best tips and tricks.
It’s all about the Bundt pan. When choosing a Bundt pan, your best bet is one that is made from anodized aluminum with a light colored, non-stick finish. Nordic Ware is the gold standard when it comes to Bundts. The simpler the design, the better. More intricate, fancier designs generally have more nooks and crannies for the cake to stick to.
Prep your pan. If you search the interwebs, you’ll notice a lot of debate on this topic. Some swear by greasing your bundt pan with butter and flour. Others are fans of brushing the inside of the pan with melted shortening. And some prefer to use a good quality non-stick baking spray and call it a day. I fall into the latter category and it works for me every time. Choose a trusty non-stick baking spray (I like Baker’s Joy) and spray your pan using short, quick strokes. You want to coat all sides of the pan without allowing any oil to pool at the bottom. I recommend waiting until your batter is mixed and ready to go before greasing the pan.
Set a timer for 10 minutes. As soon as you remove the cake from the oven, set your timer for 10 minutes. Not 7. Not 15. TEN minutes. After 10 minutes, the cake should pop right out of the pan.
Master the flip. This is tricker than it sounds, but don’t worry – you got this! To invert the cake, place a wire cooking rack or cake plate over the Bundt pan. Hold on tight and in one quick motion, flip the pan over to release the cake. If the cake does not drop immediately, flip the pan back over and wait 5 minutes to try again. If your cake does come out with a few missing pieces stuck to the bottom of the pan, don’t despair. That’s what the cream cheese frosting is for!

Tips for the best cream cheese glaze
The luxuriously smooth cream cheese glaze makes this red velvet bundt cake a real show-stopper. It’s rich and creamy, thick and tangy and absolutely lick-from-the-spoon worthy! Keep these tips in mind when whisking up your glaze.
Use room temperature cream cheese. This is crucial to a silky smooth icing. Leave the cream cheese out an hour or two before making the glaze so that it blends seamlessly with the powdered sugar.
Use a hand mixer. For best results, use a hand mixer to make the frosting. It will help you get the perfect consistency that is thick, but pourable. It should only take about 2 minutes to whip up the cream cheese glaze.
Consistency is key. For the glaze to fall effortlessly down the sides of the cake, you’ll want the glaze to be thick, but not too thick. Once you’ve mixed the ingredients, test the consistency by drizzling some of the icing off of a large spoon over the bowl. If it’s too thick, add more heavy cream. If too thin, add more powdered sugar.
Cool the cake completely. Warm cake and cool frosting don’t mix. Make sure to cool the cake completely before pouring on the cream cheese frosting. It will be worth the wait!


How to decorate a bundt cake
There’s a lot to love about a slice of red velvet cake slathered in a thick cream cheese glaze. If you ask me, that classic red velvet taste is just as much about the cake as it is the frosting! But, if you’re not a big fan of cream cheese, here’s a few more delicious ways to top your Bundt:
- Dust with sifted powdered sugar – so easy!
- Drizzle with vanilla glaze – a simple alternative to cream cheese icing.
- Cover in chocolate ganache – more chocolate? Yes, please! Chocolate and red velvet are delicious together.
- Top with sprinkles, mini chocolate chips or cake crumbs – for an extra festive touch!

How to store red velvet cake
For maximum freshness, store the cake tightly covered at room temperature for a day or two. If you still have some left over, place it in the refrigerator. To freeze the whole cake, cool the baked Bundt completely and then wrap in two layers of plastic wrap and one layer of aluminum foil. Freeze for up to 3 months. Defrost the cake at room temperature and glaze just before serving.
You can also freeze individual slices of the cake – they’ll defrost faster at room temperature. Perfect for a last minute treat!

FAQ’s
Yes! Bundt cakes are great make-ahead cakes because they keep well and are easy to decorate just before serving. Store the cooled cake tightly covered at room temperature and then drizzle on the cream cheese glaze when ready to eat. You can also freeze a whole bundt cake (unfrosted) for up to 3 months.
Absolutely! For an extra chocolatey flavor and a bit of crunch, add up to 1 cup of mini chocolate chips to the batter just after mixing in the dry ingredients.
I haven’t tested this cake using gluten-free flour but I think it will turn out great! Simply substitute the all-purpose flour with your favorite gluten free baking flour. I love King Arthur’s Measure for Measure Gluten Free Flour. Use a kitchen scale for accuracy when measuring.
Yes. This recipe will make 12 mini bundt cakes. Reduce the baking time to about 15 minutes. You can also bake this recipe into 24 cupcakes. Fill the liners about 2/3 of the way full and bake for 16-18 minutes.
This simple cream cheese icing is very forgiving. Once you have mixed the ingredients together, try a test pour over the bowl. If it’s too runny, add more confectioners sugar, a few tablespoons at a time. If too thick, add more heavy cream.
Of course. Divide the batter evenly between 3 8-inch layer cake pans and bake for about 25-30 minutes.
Happy Valentine’s Day bakers and happy baking!
Looking for more delicious bundt cake recipes? Give these a try:

Red Velvet Bundt Cake Recipe
- Prep Time: 20 minutes
- Cook Time: 45 minutes
- Total Time: 1 hour 5 minutes
- Yield: 12 slices 1x
- Category: Cakes & Cupcakes
- Method: Baking
- Cuisine: American
Description
Look no further for the perfect red velvet bundt cake! It’s super moist and drizzled with a silky smooth cream cheese frosting. Save room for a second slice!
Ingredients
Cake
- 2 cups (250 g) all-purpose flour, spooned and leveled
- 1/4 cup (27 g) natural cocoa powder, sifted
- 1/2 teaspoon salt
- 1 1/4 teaspoon baking soda
- 1 1/2 sticks (168 g)unsalted butter, room temperature
- 2 tablespoons neutral oil, like canola
- 1 cup (200 g) granulated sugar
- 1/2 cup (100 g) light brown sugar, packed
- 3 large eggs, room temperature
- 3/4 cup buttermilk, room temperature
- 1 1/2 teaspoons vanilla extract
- 1 1/2 teaspoons white vinegar
- 1 tablespoon red food coloring (I use AmeriColor Super Red Gel Food Coloring)
Cream Cheese Frosting
- 2 ounces cream cheese, room temperature
- 1 1/2 cups (150 g) powdered sugar
- 4–7 tablespoons heavy cream
- 1/2 teaspoons vanilla extract
Instructions
Cake
- Adjust the oven rack to the middle of the oven and preheat it to 350˚ F.
- Whisk together the flour, sifted cocoa powder, salt and baking soda to a medium bowl. Set aside.
- Add the butter, oil and sugars to the bowl of standing mixer and mix on medium-high for 1-2 minutes until light and fluffy.
- Add one egg at a time, fully incorporating the egg before adding the next one. This will be about 20-30 seconds on medium low after each egg addition. Scrape down the mixing bowl as needed.
- Turn the standing mixer to low, and add the buttermilk, vanilla and vinegar. Mix until combined. Add the food coloring and mix to incorporate.
- Add the dry ingredients in two additions. Mix until just combined and then using a spatula make one final turn of the batter to make sure all the of the ingredients have been mixed in.
- Spray the 10-12 cup Bundt pan with baking spray. Transfer the batter into the pan. Smooth the top of the batter with a spatula and give the pan a good bang on the counter to eliminate any air pockets.
- Bake for 45-50 minutes. The cake is done when you press the top and it springs back, and when a toothpick inserted in the center of the cake comes out with a few crumbs remaining. Do not over bake.
- Let the cake cool for 10 minutes (set a timer). The edges of the cake will start to pull away from the pan while it cools. After 10 minutes, invert the cake onto a wire rack or cake plate and lift off the pan. If using a nonstick Bundt pan and it was well greased, the pan should easily release the cake. Cool completely before adding the icing.
Cream Cheese Frosting
- To make the cream cheese icing, mix the cream cheese, powdered sugar, heavy cream (start with 4 tablespoons) and vanilla together with a hand mixer on medium speed. Slowly add more cream, a tablespoon at a time, until you get the consistency that you prefer. Use a spoon to drizzle the icing on top of the fully cooled Bundt cake.
Notes
Store cake tightly covered in the refrigerator for up to 3 days.
Cake may be frozen for up to 3 months. Cool the cake completely and wrap tightly in two layers of plastic wrap. Defrost at room temperature and add the cream cheese glaze just before serving.


Hot Chocolate Cookies

14 Comments
Erin
September 2, 2024 at 3:54 amThis cake was dense and fairly dry. I followed the recipe to a T and baked it for the minimum time to doneness so not sure what happened. The frosting was delicious!
Heather Mubarak
September 2, 2024 at 10:13 pmHi Erin, your oven may be running hot if it was dry at the minimum baking time. No two ovens are the same so I would bake it for less time if you give it another go. The texture should be soft and moist, not dry.
Sugga
August 29, 2023 at 9:05 amCan make this cake using gluten free flour?
Heather Mubarak
August 29, 2023 at 4:07 pmYou sure can! Use an equal amount of your favorite gluten free flour blend. Make sure it contains xanthan gum. Enjoy!
Danielle
July 21, 2023 at 6:10 pmI don’t have a paddle for my mixer. Will it still work?
Susie Sharma
February 12, 2023 at 11:18 pmIs the white vinegar absolutely necessary? I’m afraid it’ll overpower the other flavors. Thanks! 🙂
Heather Mubarak
February 13, 2023 at 9:02 pmDon’t omit the vinegar. You won’t taste it a bit, promise!
Kelley M.
February 12, 2023 at 12:43 amThis cake is gorgeous!! Can’t wait to make it for Valentine’s Day next week. I’m sure it’s as delicious as all of your other bundts.
Zeena
September 1, 2022 at 5:48 pmCan I sub milk for heavy cream in the frosting?
Heather Mubarak
September 2, 2022 at 7:46 pmYes, I would suggest whole milk for a thicker frosting.
Suzie
February 15, 2022 at 4:45 pmOh I can’t wait to give this bundt cake a bake, that red velvet color is gorgeous!
Kathryn
February 13, 2022 at 8:09 pmIf this red velvet cake is half as good as your other bundt cakes, it deserves ten stars. Going to buy buttermilk now – can’t wait to make this cake for Valentine’s Day!
Heather Mubarak
February 13, 2022 at 9:12 pmAww, thank you! I hope you love it as much as I do!!
Lisa M
February 13, 2022 at 8:02 pmI love this cake. It’s very moist and the cream cheese frosting complements the cake because it’s not not super sweet. It’s perfect!