Sweets
Chocolate Lover’s Cheesecake
February 16, 2020
This chocolate lover’s cheesecake is made with a crunchy cookie crust, a silky smooth chocolate filling and topped with a […]
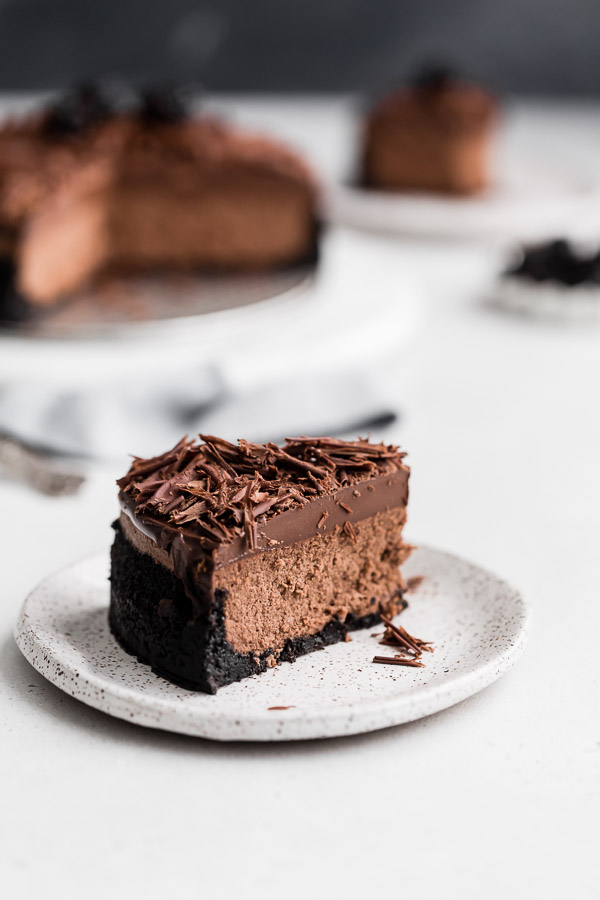
This chocolate lover’s cheesecake is made with a crunchy cookie crust, a silky smooth chocolate filling and topped with a decadent layer of rich ganache. If you love chocolate, you’ll fall head over heals for this cheesecake!

Our month long celebration of all things chocolate is still in full swing here on the blog and nothing makes me happier than doling out one decadent chocolate dessert after another. If you are looking for a seriously delicious weekend baking project, allow me to nudge you in the direction of this triple layer chocolate lover’s cheesecake.
Valentine’s Day may be in the rearview mirror but I say we keep this party going with this rich and creamy, perfectly tangy and deliciously sweet chocolate cheesecake.

I’ll say what I already know you’re thinking. Yep, we all know that cheesecake gets a bad rap for being “difficult” to make and pesky to perfect. There’s all that talk about a water bath and the business about room temperature ingredients and lots of chatter about how to avoid the dreaded crack on top. And then there’s the crust…should it go up the sides or do we stick to the bottom? Bet you can guess my answer to that. More is always better.
The whole undertaking can all be so overwhelming and I get it if you are wondering if it’s even worth the trouble. I’m here to say this chocolate lover’s cheesecake is worth every minute in the kitchen and you may just cry tears of joy when you realize how easy it is to bake a perfect chocolate cheesecake. So without further adieu, let’s chat about how to make this chocolate lover’s dream of a dessert.

To make this triple chocolate cheesecake first we start with the crust. It’s made from chocolate cookie crumbs simply crushed together and mixed with a dash of sugar and a generous pour of melted butter. We stir this together with a fork until the crumbs are evenly coated and then press the mixture into the bottom and halfway up the sides of a springform pan that is wrapped in foil.
If you don’t already have one, treat yourself to a springform pan like this one. It’s a must for easily releasing the cheesecake after chilling and it will come in handy for baking cakes too. Once the crust is evenly distributed in the pan, bake it for just 8-10 minutes at 350 degrees or until fragrant. Remove from the oven and allow the crust to chill while we mix the cheesecake.

To make the cheesecake layer we start with room temperature ingredients. I know, I know. I’m not the most patient baker either but trust me when I say you don’t want to skip this step. Room temperature cream cheese and sour cream will combine more smoothly with the other ingredients and that means less mixing and yep, you guessed it…less lumps. No one likes a lumpy cheesecake and that’s a fact. Pro-tip: set out your cream cheese, sour cream, and eggs the night before and the texture of your cheesecake will be perfectly light and creamy. Works like a charm, every time.
Start by mixing your cream cheese, sour cream, eggs, sugar and heavy cream together in a stand mixer on low speed for about 5 minutes. Once smooth and creamy we add our melted chocolate and cocoa powder along with a bit of salt. After a short mix we’ll add the eggs one at time, scraping down the sides of the bowl after each addition to be sure they are fully incorporated.
Told ya, it’s super easy. After adding the espresso and vanilla, we pour the mixture over the cooled crust and level the top with a spatula. Into the water bath it goes {more on that in a sec} and then the cheesecake is off for a low and slow bake in a 325 degree oven for over an hour.
And that my friends, is all there is to it. I promise you baking cheesecake isn’t as scary as it looks and it is #worthit. This chocolate lover’s dream of a dessert is dangerously decadent. Love at first bite if you ask me.

Check out my list of tips below for baking the very best cheesecake and be sure to read through the recipe once or twice before you get started. Use this guide each time you make a cheesecake and it will turn out flawless Every.Single.Time. Promise. Now go forth and bake this cheesecake, bakers. You got this!!

HOW TO MAKE THE VERY BEST CHOCOLATE LOVER’S CHEESECAKE
Use room temperature ingredients. This is rule numero uno when it comes to making the perfect, no fail cheesecake. If you are going to skip a step, don’t skip this one. To avoid lumps and bumps in your cheesecake filling, you’ll want the cream cheese, sour cream, and eggs to be at room temperature before you begin mixing your ingredients. Cold cream cheese will not mix will with the other ingredients and will create lumps. We are going for smooth and creamy so let the ingredients sit out for a few hours {or overnight} for best results.
Do not over mix. Over mixing the batter can cause the cheesecake to fall once it’s removed from the oven. At each step, only mix until incorporated and do not use a speed higher than medium. We do not want to incorporate any air into the filling so keep the mixing to a minimum.
Don’t skip the waterbath. Want a perfectly baked cheesecake every time? Use a waterbath. Want to nail that super smooth, crack-free cheesecake top? Use a waterbath. Waterbaths help to regulate the temperature of your cheesecake while baking and ensure that it is cooked through evenly without browning too much on top. It’s an extra step, I know, but I’m a fan of a waterbath.
Watch your oven. We bake this cheesecake for an hour and fifteen minutes but every oven runs differently so keep an eye on your cheesecake at the one hour mark. The filling should look set on the edges but still slighty jiggly underneath the center. If you see any signs of cracking in your cheesecake, turn off the oven right away and begin the cooling process. And if your cheesecake does crack, don’t despair. It all gets covered up with a thick layer of rich ganache and a sprinkle of chocolate shavings. Trust me, no one will know there is a crack hiding under all of that chocolate.
Avoid rapid temperature changes. For best results, cool the cheesecake the same way you baked it. Low and slow. To avoid those dreaded cracks on top, turn off the oven when the cheesecake is done baking and allow it to rest in the warm oven for one full hour. Then remove the cheesecake from the waterbath and place in the fridge for six hours to chill or overnight for best results. I know, I know…it’s a LOT of waiting around for this cheesecake but trust me when I say it’s totally worth the wait!

HOW TO FREEZE CHEESECAKE
This chocolate lover’s cheesecake is so rich and creamy and just all around incredibly delicious. Having a single slice left is a long shot, but should you want to store your leftover cheesecake for a rainy day, you’ll be glad to know if freezes beautifully. To freeze the whole cheesecake, simple chill according to the recipe and then release the springform from the pan. Wrap the cheesecake in two layers of plastic wrap followed by a layer of aluminum foil. Freeze for up to one month. To defrost, simply thaw in the fridge overnight and cover with chocolate ganache before serving.
To freeze individual slices, wrap tightly in plastic wrap and then place in a large ziplock bag for up to one month. Enjoy within two days of thawing in the refrigerator.
If you like this Chocolate Lover’s Cheesecake, you’ll also love:
Mini Triple Chocolate Cheesecakes
Peanut Butter Chocolate Ganache Tart
Print
Chocolate Lover’s Cheesecake
- Prep Time: 30 mins
- Cook Time: 75 mins
- Total Time: 1 hour 45 mins
- Yield: 1 1x
- Category: Sweets
Description
This chocolate lover’s cheesecake is made with a crunchy cookie crust, a silky smooth chocolate filling and a decadent layer of rich ganache. If you love chocolate, you’ll fall head over heals for this cheesecake!
Ingredients
For Crust
- 1 3/4 cups crushed Oreos (without cream centers)
- 2 TBSP granulated sugar
- 5 TBSP unsalted butter, melted
- pinch of salt
For Cheesecake Filling
- 3 – 8 ounce blocks plain cream cheese, room temperature
- 1 1/4 cups superfine granulated sugar
- 1/2 cup heavy whipping cream, room temperature
- 1/3 cup sour cream, room temperature
- 10 ounces bittersweet chocolate chips, melted and slightly cooled
- 1/4 cup unsweetened cocoa powder
- 1/4 tsp kosher salt
- 4 eggs, room temperature
- 1 TBSP vanilla extract
- 1 TBSP freshly brewed espresso or coffee, cooled to room temperature
- chocolate shavings for garnish
For Ganache
- 1 1/3 cups heavy whipping cream
- 1 1/4 cups bittersweet chocolate, chopped
- 4 TBSP unsalted butter, softened to room temperature
Instructions
For Crust
- Preheat oven to 350 degrees.
- Cover the bottom and sides of a 9 inch springform pan with aluminum foil, wrapping the pan up to the edges so that no water can leak in from the waterbath. Use a double layer of foil if you like.
- Pulse the Oreo pieces in a food processor until finely ground. If you don’t have a food processor, you can place the cookies in a ziplock bag and use a rolling pin to crush the cookies into fine bits. Add sugar and the pinch of salt, pulse to combine.
- Pour crumbs in a medium bowl and add melted butter. Stir together with a fork until evenly coated.
- Scoop the mixture into the springform pan and use your hands to press the crust evenly across the bottom and halfway up the sides of the pan. Use the backside of a measuring cup to press the crust down firmly.
- Bake for 8-10 minutes on the lower third of the oven.
- Remove from the oven to cool slightly and reduce the oven temperature to 325 degrees.
For Cheesecake Filling
- In the bowl of a food processor fitted with the paddle attachment, beat together the cream cheese, sugar, sour cream and heavy cream for about 5 minutes on low speed. Mixture should be smooth and creamy.
- With mixer on low speed, add melted chocolate and unsweetened cocoa powder, followed by the salt.
- Mix on medium speed for 30 seconds to combine well.
- Reduce mixer to low speed and add eggs, one at a time. Scrap down sides of bowl after each addition.
- Once eggs are fully incorporated, add the vanilla and cooled espresso. Beat on low speed until just combined.
- Place the springform pan with cookie crust into a larger pan or roasting pan. Pour the cheesecake filling over the crust, smoothing out the top with an off set spatula.
- Heat water in a saucepan until boiling and pour into the surround pan, being careful not to spill any on the cheesecake. Fill the surrounding pan so that the water goes up halfway around the springform pan.
- Place in the oven and bake at 325 degrees for an hour and fifteen minutes. After one hour, check the cheesecake often for cracks. If cracks begin to form, turn off the oven and begin the cooling process.
- If you want a firmer cheesecake, bake it for closer to an hour and thirty minutes, checking often.
- Once the cheesecake is baked, turn off the oven and leave the cheesecake in the warm oven for one hour.
- Remove from the oven and take the springform pan out of the waterbath. Chill in the refrigerator for 6 hours or overnight for best results.
For Gananche
- Place chopped chocolate in a medium bowl.
- Heat heavy cream over medium high heat until simmering.
- Pour half of the hot cream over the chocolate and allow to sit for 1 minute.
- Whisk quickly and then add remaining cream.
- Stir together with a whisk until smooth and glossy.
- Add butter and stir until butter is fully incorporated.
- Cool to room temperature before spreading the ganache over the top of the cooled cheesecake.
- Add chocolate shavings if desired.
- Allow the ganache to set before slicing.
- For a clean cut, use a sharp knife and press firmly down and then out from the edge of the cheesecake. Do not pull up with the knife. Run the knife under warm water and wipe with a towel in between each slice.


2 Comments
Amanda
April 27, 2020 at 6:04 pmThis cheesecake is out of this WORLD. Heather’s tips and tricks helped me so much. I have tried to make cheesecakes before but they have cracked or dried out. Not this one. It is perfectly moist, sinfully delicious and NO CRACKS so it’s beautiful!!! Thank you Heather for this awesome recipe <3
Heather Mubarak
April 27, 2020 at 8:28 pmThanks so much!! I’m so glad you found success with this recipe!