Bars & Brownies • Chocolate
Brown Butter Brookies
May 13, 2025
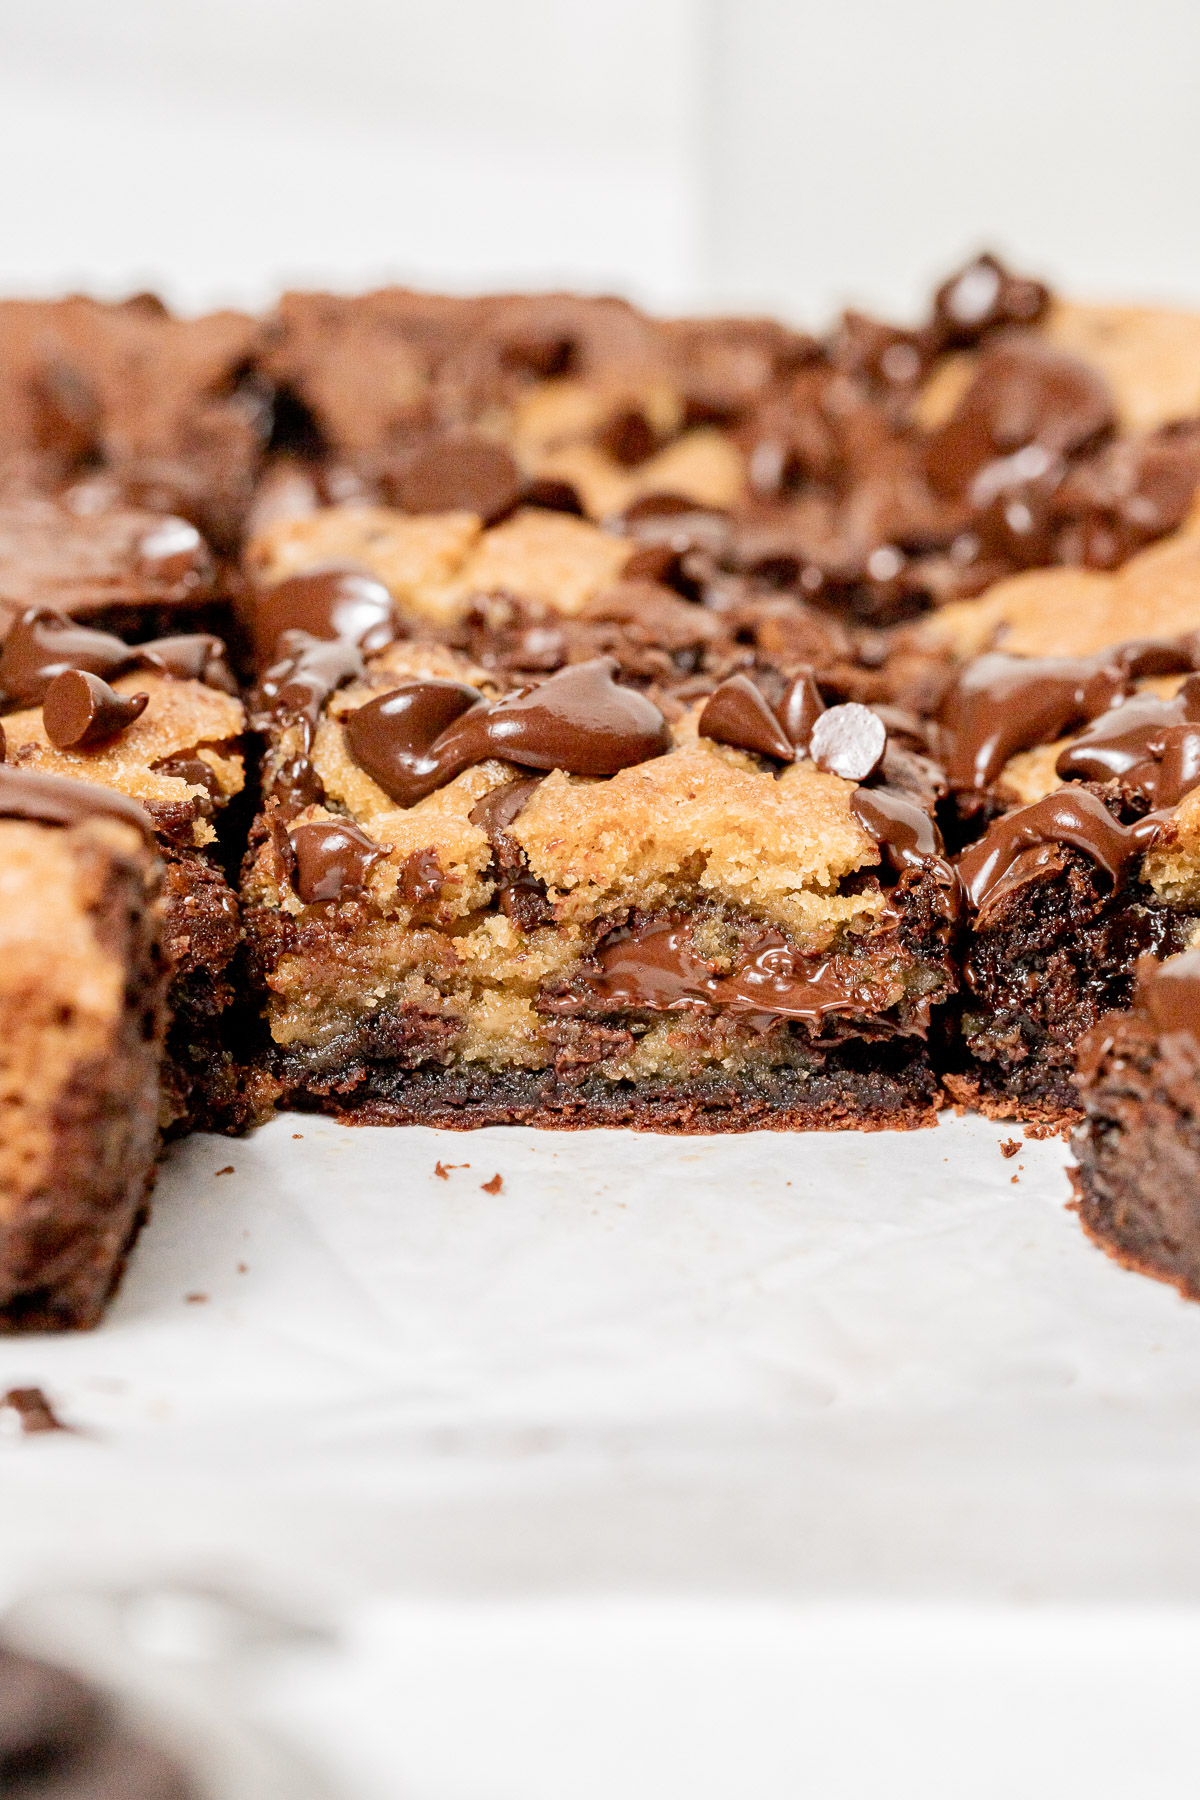
Satisfy all of your cravings with a batch of these soft and chewy Brown Butter Brookies. Made with equal parts […]
Satisfy all of your cravings with a batch of these soft and chewy Brown Butter Brookies. Made with equal parts brown butter chocolate chip cookie and rich, ultra fudgy brownie, these one pan wonders are the ultimate chocolate lover’s treat. Get the best of both worlds with this crowd pleasing dessert!

So here’s the thing. You know how I always say that classic chocolate chip cookies are my all time favorite dessert? Well, I take it back. One bite of these dangerously delicious Brown Butter Brookies and I’m like “chocolate chip cookie who??”. If you aren’t yet familiar with brookies, allow me to introduce you to the most chocolatey, chewy, fudgy, crazy delicious cookie bar ever!! It’s a real double doozy of a dessert and you’re going to LOVE them.

What exactly is a brookie?
Brookies are the ultimate mashup for those dessert lovers who can’t decide between a cookie and a brownie. Pretty much sums me up in a nutshell. What can I say? My sweet tooth wants it ALL! With a brookie, you get a cookie and a brownie all rolled into one rich and decadent dessert. You simply can’t go wrong. The concept is brilliant really and the person that invented the all-mighty brookie deserves a gold star. These brown butter brookies are made with equal parts of my go-to chocolate chip cookie with a twist {hello brown buttah!} paired with a deep, dark, fudgy brownie.

What makes these brookies so good?
These brookies are perfect for feeding a crowd, but so good that you won’t even want to share! Here’s a few reasons why you’ll love this recipe:
Best of both worlds. Half chocolate chip cookie, half brownie, 100% delicious!
A chocolate lover’s dream! These brookies are soooo chocolately and I’m here for it.
Easy to make. All you need is a handful of basic ingredients to whip up these easy one pan bars.

Ingredients
The beauty of this recipe is that it comes together in about an hour with basic cookie and brownie ingredients. Here’s what you’ll need:
- Flour. Just regular all-purpose will do. Nothing fancy here.
- Butter. You’ll use both brown butter for the cookie dough and regular melted butter for the brownie batter in this recipe. No need to set butter out in advance to soften so you can get to baking the minute the craving strikes. If you haven’t browned butter before, not to worry! Check out this post for everything you need to know to brown butter like a pro.
- Sugar. We’re using both granulated sugar and the brown sugar for this recipe. The combination of white and brown sugar adds both sweetness and moisture to the brookies. If you don’t have light brown sugar on hand, dark brown sugar will work.
- Eggs. Don’t forget to set your eggs out in advance to reach room temperature before beginning to mix your dough and batter. Or, set them in a bowl of warm water for 10 minutes before baking.
- Baking soda and baking powder. We need both types of leaveners in this recipe to help give the brookies texture and rise. Check the expiration dates to be sure they are fresh.
- Vanilla. For added depth of flavor.
- Chocolate. For the best flavor, use high quality cocoa powder and premium chocolate chips like Guittard or Ghirardelli. These brookies are totally worthy of the good stuff.

How to make brown butter brookies
These brown butter brookie recipe is a cinch to make when the craving strikes! Follow this easy step-by-step guide and check the recipe card below for ingredients and detailed instructions. You can use a stand mixer or a hand mixer to make both the cookie dough and brownie batter.
Step 1: Brown the butter and chill for 1 hour.
Step 2: Mix the brown butter chocolate chip cookie dough.
Step 3: Mix the brownie batter.
Step 4: Layer the cookie dough and brownie batter in an 8 x 8 pan.
Step 5: Bake at 350°F for approximately 25 minutes.

Tips for the best brookies
Brown the butter. At risk of sounding like a broken record, don’t skip this step. Brown butter is pretty much liquid gold. It gives the most delicious, slightly caramelized flavor that pairs perfectly with the bittersweet, fudgy brownies. If you are new to browning butter, follow this step by step guide for everything you need to know.
Do not over mix. Less is more when it comes to mixing. Use a light hand when mixing both the cookie dough and the brownie batter and use a spatula to fold in the chocolate chips so that you do not risk over working the cookie dough.
Watch the oven. Every oven runs differently so keep an eye on your oven to prevent over baking. To keep the top from browning too quickly, place a large piece of aluminum foil loosely over the top around the 20 minute mark. The brookies are done baking when the edges are golden brown and the center is almost set. The bars will continue to bake when removed from the oven.
Cool completely. These brookies are hella good straight from the oven but for those clean, sharp edges be sure to cool the bars completely and consider chilling the pan in the fridge for a bit before slicing with a clean, sharp knife.

How to serve
Store brookies tightly covered at room temperature for up to 4 days. You’ll be happy to know that these one pan wonders are super freezer friendly, although I’m guessing they won’t actually make it that far. Truth be told, I love noshing on them straight from the freezer on a hot day. Or top with a giant scoop of vanilla ice cream and a drizzle of hot fudge for a positively decadent treat!

Enjoy every morsel, my friends!
Happy baking!
If you like these Brown Butter Brookies, you’ll also love:

Brown Butter Brookies Recipe
- Prep Time: 15 mins
- Cook Time: 25 mins
- Total Time: 40 mins
- Yield: 16 squares 1x
- Category: Bars & Brownies
- Method: Baking
- Cuisine: American
Description
Satisfy all of your cravings with a batch of these soft and chewy Brown Butter Brookies. Made with equal parts brown butter chocolate chip cookie and rich, ultra fudgy brownie, these one pan wonders are the ultimate chocolate lover’s treat. Get the best of both worlds with this crowd pleasing dessert!
Ingredients
For Chocolate Chip Cookie Layer
- 1/2 cup (113 g) unsalted butter, browned and chilled for one hour
- 1/4 cup (50 g) granulated sugar
- 1/3 cup (66 g) light brown sugar, packed
- 1 large egg, room temperature
- 3/4 teaspoon vanilla
- 1 cup plus 2 tablespoons (143 g) cups all-purpose flour, spooned and leveled
- 1/2 teaspoon baking soda
- 1/4 teaspoon kosher salt
- 3/4 cup (120 g) chocolate chips (I like a mix of bittersweet and semi-sweet chips)
For Brownie Layer
- 5 ounces bittersweet chocolate (I use 60% cocao)
- 1/4 cup (57 g) unsalted butter
- 1 large egg plus one egg yolk, room temperature
- 1/3 cup (66 g) granulated sugar
- 1/4 cup (50 g) light brown sugar, packed
- 1 teaspoon vanilla
- 1/4 teaspoon baking powder
- 1/3 cup (42 g) all purpose flour, spooned and leveled
- 3 tablespoons (23 g) Dutch process cocoa, sifted
- 1/4 teaspoon kosher salt
Instructions
**Note: brown the butter for the chocolate chip cookie layer first and refrigerate it for 60 minutes before you begin mixing the cookie dough and brownie batter.
For Chocolate Chip Cookie Dough
- To brown the butter, place butter in a medium saucepan over medium heat. Stir occasionally until butter has melted. Continue stirring often as butter begins to foam and crackle. Do not leave the butter unattended at this stage. Stir the butter as it sizzles and after about 4-5 minutes, bits of golden brown butter will fall to the bottom of the pan. The crackling sound will stop and the butter will be aromatic and amber in color.
- Remove the butter from the heat and pour it into a heat safe bowl. Place the bowl of brown butter in the refrigerator for about 60 minutes or until cooled and firm to the touch. You can speed this up after about 30 minutes by placing the bowl in the freezer.
- Once cooled, spoon the brown butter into the bowl of a stand mixer fitted with the paddle attachment.
- Add the sugars and beat on medium high speed for 2 to 3 minutes until light and fluffy.
- Add the egg and vanilla and mix until well combined.
- In a separate bowl, whisk together the flour, baking soda, and salt.
- With the mixer on low speed, gradually add the flour mixture in 3 additions. Scrape down the sides of the bowl as needed. Do not over mix. A few streaks of flour remaining is ideal.
- Remove the bowl from the stand mixer and use a spatula to fold in the chocolate chips. Set aside until ready to assemble.
For Brownie Layer
- Preheat oven to 350°F.
- Spray a 8 x 8 inch pan with non-stick baking spray and line the bottom and sides with parchment paper. Allow the edges of the parchment to extend over the sides of the pan for easy removal of the bars once cooled.
- In a medium saucepan over low heat, melt the chocolate and butter together. Stir often until the butter is melted and the chocolate is smooth and shiny. Remove the pan from the heat and set aside to cool slightly.
- In the bowl of a stand mixer fitted with the whisk attachment, beat together the egg, egg yolk, sugars and vanilla on high speed for 4 to 5 minutes until the mixture is thick and pale in color.
- Reduce the speed to low and add in the cooled, melted chocolate and butter mixture. Mix until incorporated.
- In a separate bowl, whisk together the flour, cocoa, baking powder and salt.
- Remove the bowl from the mixer and use a spatula or wooden spoon to fold in the dry ingredients until just barely combined. Do not over mix.
To assemble the brookies, start by spooning about 1/3 of the brownie mixture into the bottom of the prepared pan using an offset spatula to roughly smooth it evenly across the bottom of the pan.
Alternate spoonfuls of chocolate chip cookie dough and brownie batter across the pan, creating a marbled look. Continue until all of the cookie dough and brownie batter are used.
Gently press the mixture down with an offset spatula, leveling the top just slightly. Do not over work the dough or flatten the brookies too much.
Bake at 350°F for about 25 minutes or until the edges are golden brown and the center is set. If the cookie dough begins to brown too quickly, place a piece of aluminum foil loosely across the top and continue baking.
For firmer brookies, bake for closer to 30 to 35 minutes. For gooey brookies, bake for less time.
Remove the pan from the oven and cool completely before slicing.
For sharp edges and even slices, chill the brookies for one hour before slicing with a sharp knife.
Notes
Store tightly covered at room temperature for up to 4 days.
Brookies freeze well. Wrap tightly in a layer of plastic wrap followed by a layer of aluminum foil. Defrost at room temperature.
**Originally published May 2021


20 Easy and Delicious Easter Desserts

39 Comments
Avery
February 5, 2025 at 9:50 amMade these last night and swirled one half of the pan with Biscoff cookie butter and the other half with pistachio cream. So good!
Lu
February 12, 2025 at 6:56 pmAnyone else notice how @brownedbutterblondie never takes the time to answer anyone’s questions? She can’t be that busy and think it’s ok to just ignore people.
Heather Mubarak
February 13, 2025 at 8:50 pmHi Lu,
Looks like we are up to date on replies! It can be difficult to get to all of the comments and many of the questions are answered in the text throughout the blog post which I always encourage people to read. Is there a specific question we can help you with?
M
December 3, 2024 at 4:19 amHi
Absolutely love these, they came out so delicious
I wanted to know how can I measure that the brownie batter and cookie dough are the same amount.
Don’t get me wrong I absolutely love yours but I wanted to try it with another brownie batter and I’m not sure how to divide it
Heather Mubarak
February 13, 2025 at 8:37 pmI’m so glad you enjoyed the brookies! You could measure the weight of the brownie batter using a kitchen scale. This recipe works with my brownie recipe but I cannot speak to other brownie recipes.
Nay
March 12, 2024 at 4:12 pmHi! I was wondering if I could substitute the Dutch processed cocoa powder with natural unsweetened?
If not, which brand of Dutch processed powder would you recommend? Seems hard to find in my grocery stores!
Thank you in advance!
saadiyah
November 26, 2023 at 12:32 amhello! I was wondering if it’s possible to make this layered, like put the brownie layer at the bottom and ccc layer on top? instead of swirled together
Heather Mubarak
November 26, 2023 at 5:53 pmSure! That will work just fine. Enjoy!!
Anonymous
August 27, 2023 at 5:57 amFor the brownies, can we do both, dark and bittersweet chocolate?
Heather Mubarak
August 27, 2023 at 3:03 pmAbsolutely!
Azkiah
January 22, 2022 at 8:15 pmHello, how long this brookies can be kept in room temp and fridge? Thanks!
Heather Mubarak
February 13, 2025 at 8:44 pmUp to four or five days. If refrigerating, they will dry out faster. They also freeze beautifully if wrapped well. Defrost at room temperature or enjoy frozen!
Emily Peers
October 2, 2021 at 12:51 amHalf brownie, half cookie? This is genius! These are amazing!
Hannan
July 24, 2021 at 7:52 pmThis recipe was so easy to make and definitely a keeper. I tried it today and came out to be the perfect weekend indulgence. Definitely going to make another batch soon.
Heather Mubarak
July 28, 2021 at 3:52 amSo glad you loved it!! Thanks for trying my recipe!
Sophie
July 13, 2021 at 12:08 amThese are so good! Taste amazing and perfect texture! Thanks so much for the great recipe!
Heather Mubarak
July 14, 2021 at 7:32 pmHappy to hear you loved these brookies! They are always a hit!!
Kahy
May 27, 2021 at 1:52 amQuick question-
Recipe states to use an 8×8 pan but one of the questions/comments is asking about making half the recipe and you suggested an 8×8 or 9×9. Should the recipe be made with a 13×9 for the recipe as written and 8×8 for half the recipe?
Thank you. Can’t wait to try them.
Heather Mubarak
May 27, 2021 at 3:24 amHi! Sorry for any confusion. This recipe was originally written in 2020 for a larger 13 x 9 inch pan. Lots of readers were asking for a smaller portion so the recipe has since been revised to make an 8 x 8 pan. Enjoy!
Angeli
May 13, 2022 at 1:32 amHi Heather. What is the original recipe for the 9×13 pan? Thank you.
Heather Mubarak
May 13, 2022 at 5:23 amThis recipe was revised for a smaller, more manageable 8 x 8 square pan size. You can always double the recipe and make it in a 9 x 13 pan.
Anonymous
August 23, 2024 at 10:29 pmHow long would you bake for 9×13?
Fanda
May 22, 2021 at 4:19 amLove this brookies! I do reduce half of the white sugar because I was afraid it will be too sweet (we don’t have bittersweet chocolate in my country, they’re all sweet) and it turned out just right. The texture is a so good, brownie and soft cookies with a bit of crunch at the top. The smell of the brown butter is so yummy… Can’t get enough. Thanks for the recipe!
Sioned
May 10, 2021 at 8:45 pmWas so delicious and made so many! I wish I had baked it a little less to get the best texture but it was still devoured very quickly by me and my friends. I converted everything to grams using online tools and it worked well. I used chopped chocolate instead of chocolate chips and next time I’ll be putting something into the brownie!
Heather Mubarak
May 11, 2021 at 6:34 amI’m so glad you enjoyed these brookies! They really are the best of both worlds!!
Naomi
February 3, 2021 at 2:52 amBaked them today. The cookie part was a bit dry (I’m using KA flour and without using weight measures it could have been too much flour). The baking time was correct (and my oven is calibrated) as the brownies were nice and gooey (and tasted great), but the cookie part was drier. I’m sure people at work will love them though.
Overall, I wish weight measurements were added to the recipe.
Heather Mubarak
February 3, 2021 at 6:50 pmHi Naomi! Thanks for trying my recipe. These brookies are definitely best when slightly under baked. We are working on adding weight measurements to all recipes so stay tuned!
Anushri
December 7, 2020 at 9:37 pmHii do you have a egg substitute for this recipe
Heather Mubarak
December 8, 2020 at 8:01 amHi! I have not made this recipe with an egg substitute but you could try a flax egg. Keep in mind the texture will be a bit different if you make substitutions.
Alessandra
February 11, 2021 at 2:01 amHi,
How can I make this into heart shape like you have it on the picture prior to clicking for recipe?
Heather Mubarak
February 12, 2021 at 2:09 amTo make these heart shaped brookies, layer the cookie layer on top of the brownie layer and then bake. Rather than swirling the two batters together. Once they have cooled, cut into heart shapes using a cookie cutter. Enjoy!
Heather
October 19, 2020 at 5:48 amI swoon over swirls and knew the minute I saw the photo that I had to make these. Seriously delicious! The process is a little involved, since you’re making two separate recipes, but it makes a large batch, so you’ll have treats for days. I baked mine in a 9×13 Pyrex pan for 30 minutes, and they were perfect (my oven thermometer showed the temp was slightly above 350). I didn’t have as much baking chocolate as I thought I did, so I ended up using 8.5 oz of assorted 72% cacao and 1.5 oz of 100%. Yum!
Heather Mubarak
October 21, 2020 at 5:56 amI’m so thrilled that you loved this recipe!! They are a little bit of extra work but these bars are definitely at the tippy top of my favorites list!
Ígbí Ãmãñdã
August 21, 2020 at 10:45 amCan a microwave oven be used
And I’m dying to make this
Heather Mubarak
August 23, 2020 at 4:28 amHi! I don’t recommend making this recipe in a microwave oven. The brookies should be baked at 350 degrees in a standard oven.
Trudy Kimbrough
August 21, 2020 at 12:29 amHi,
I’m dying to make these for my chocoholic husband and daughter. I have one quick question…do you bake these in the middle of the oven, or upper middle?
Thanks!
P.S. Looove your blog!
Heather Mubarak
August 21, 2020 at 7:44 amI’m so glad these tempted you! I bake these brookies in the center of the oven. Enjoy!!
Aaisha
August 20, 2020 at 7:57 amHi! If I want to make half the recipe, what size pan should I use?
Heather Mubarak
August 21, 2020 at 7:45 amI haven’t tried this recipe in a smaller pan just yet but if you want bake half of the recipe I would recommend a 8 x 8 or 9 x 9 inch pan. Let me know how it goes!